Setup Raspberry Pi
In this section, we’ll configure the Raspberry Pi to act as a device gateway that collects data from ESP32 sensors and forwards it to AWS IoT Core.
Prerequisites
Your Raspberry Pi must be model 3B or higher to run the provided source code effectively.
Step 1: Install Raspberry Pi OS
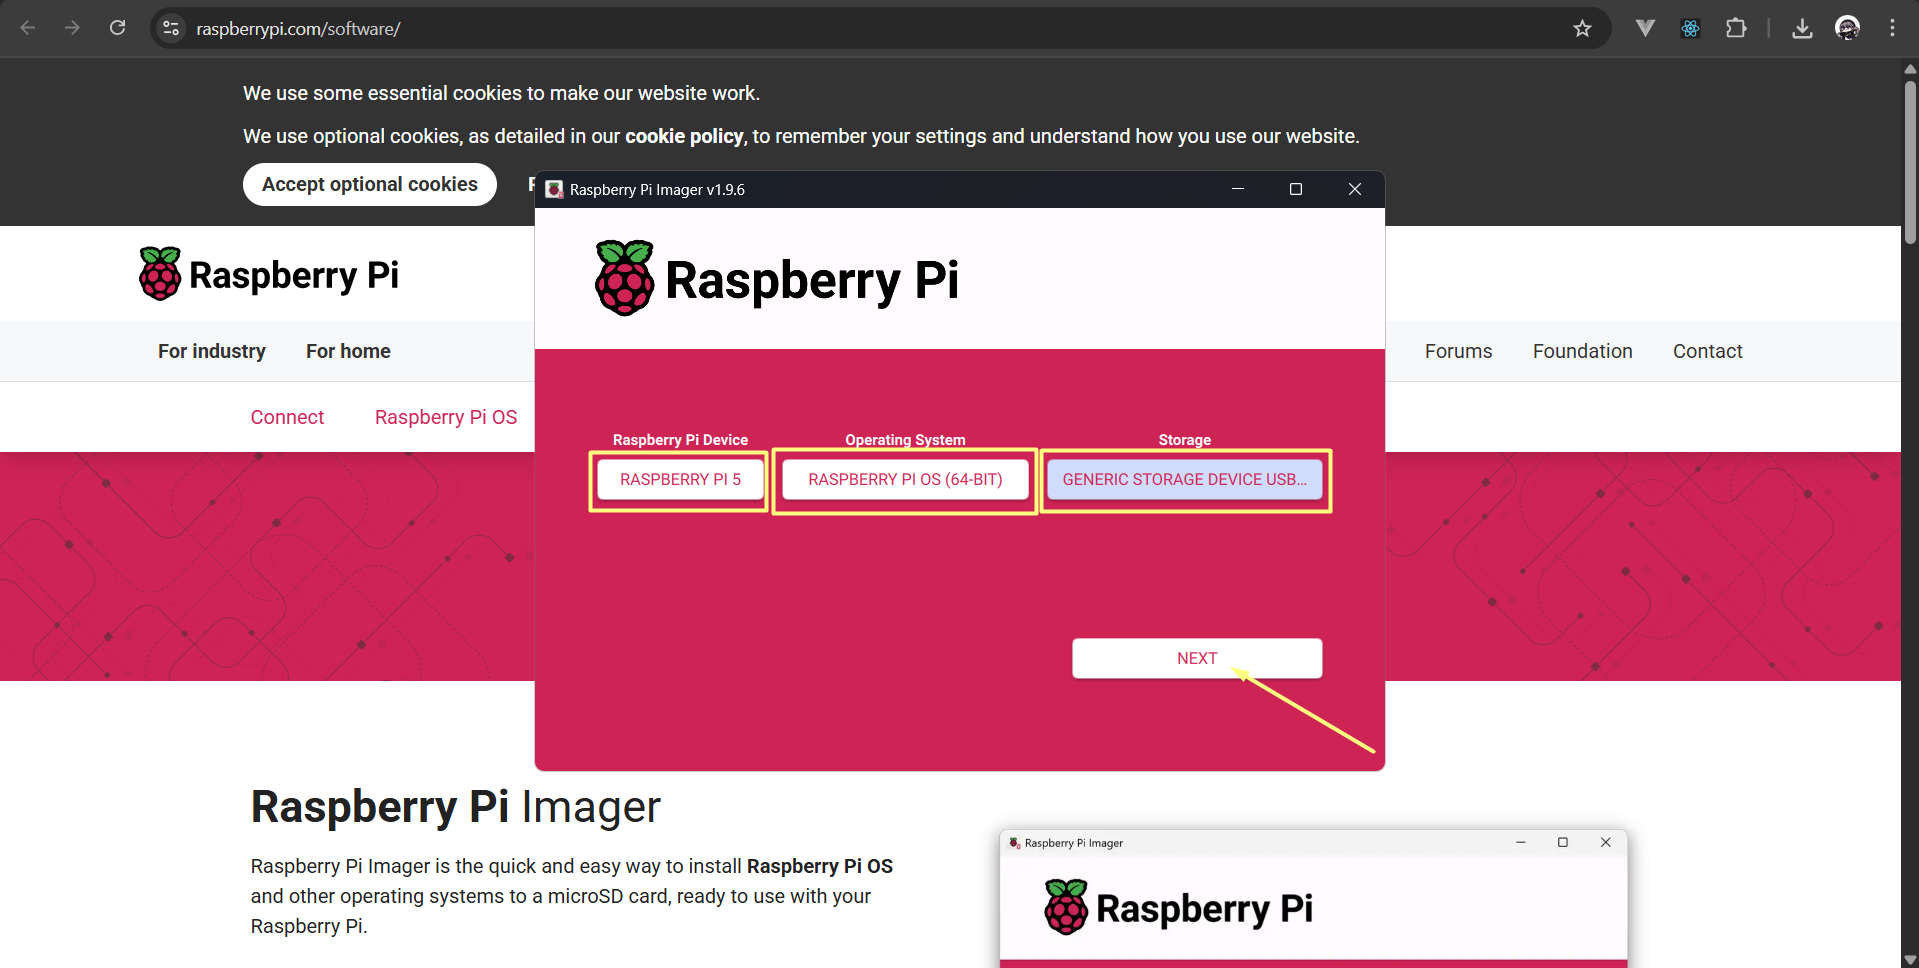
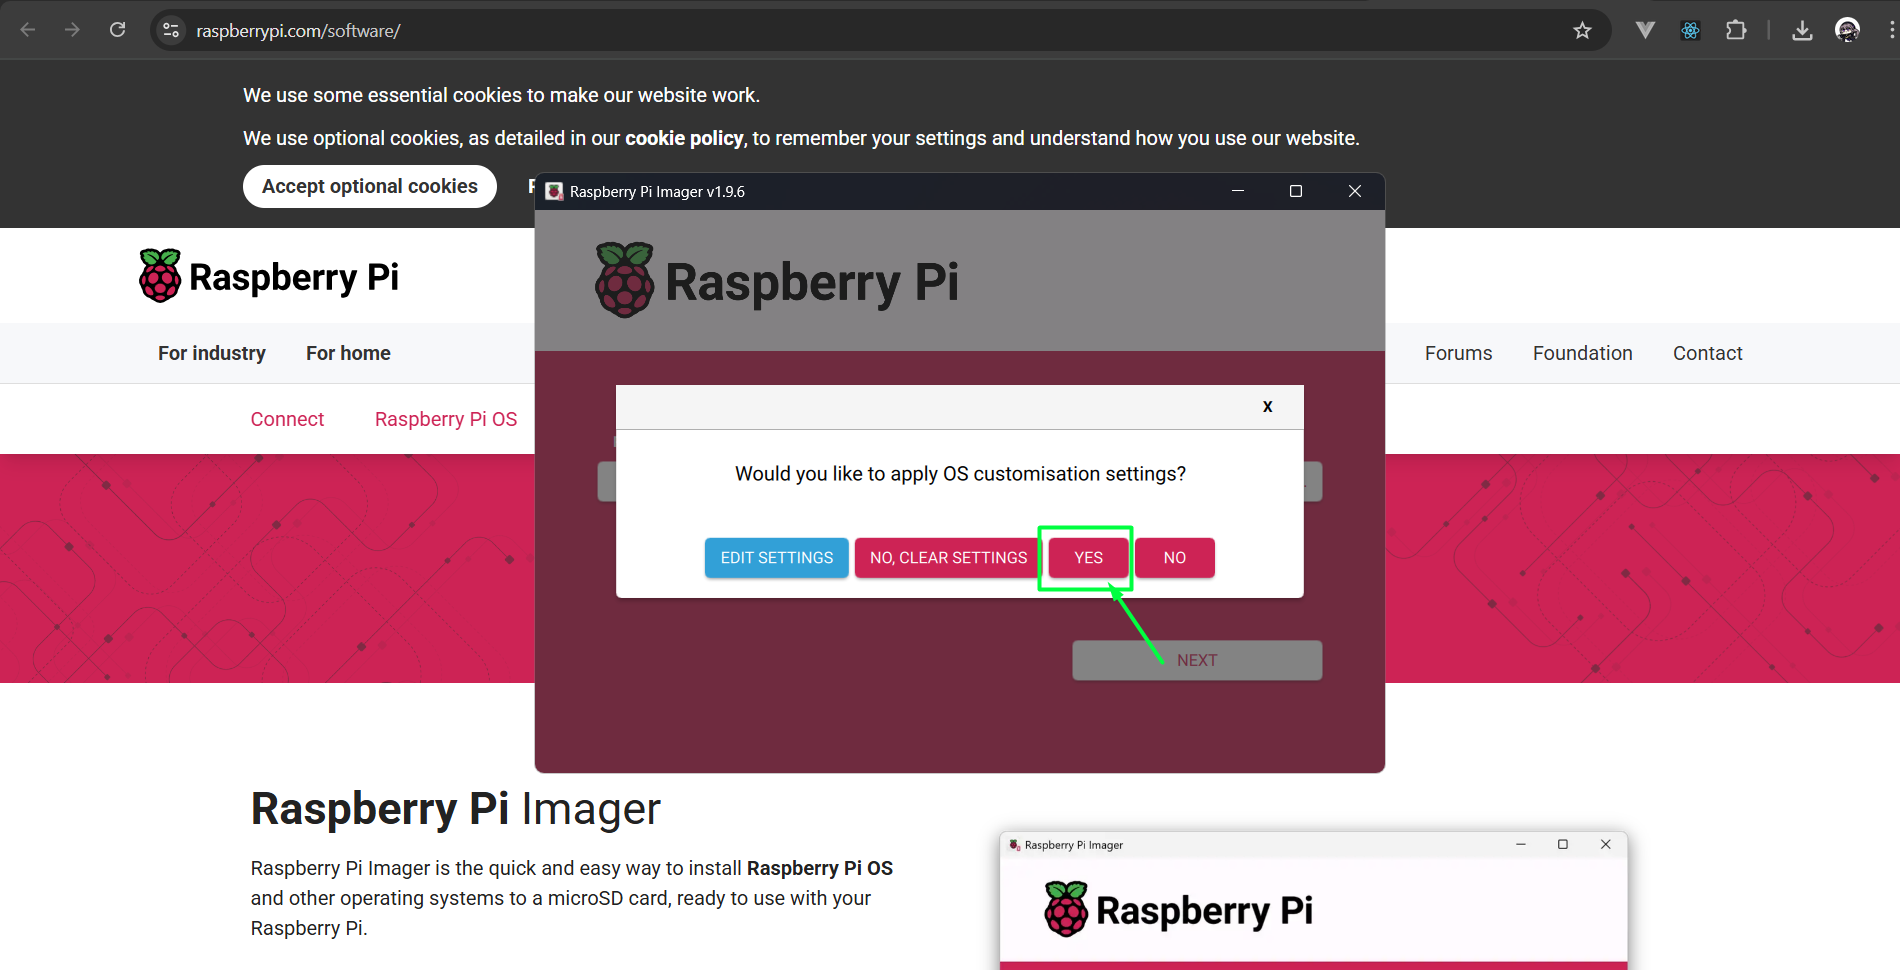
Open Raspberry Pi Imager, plug in the MicroSD card and flash the OS. You can use any OS, I’m using Ubuntu Server, but if you are new to Raspberry Pi, I recommend Raspberry Pi OS (RaspiOS), it’s simple and beginner friendly
When you select the storage device, make sure you select the correct one. All data on the selected device will be erased.
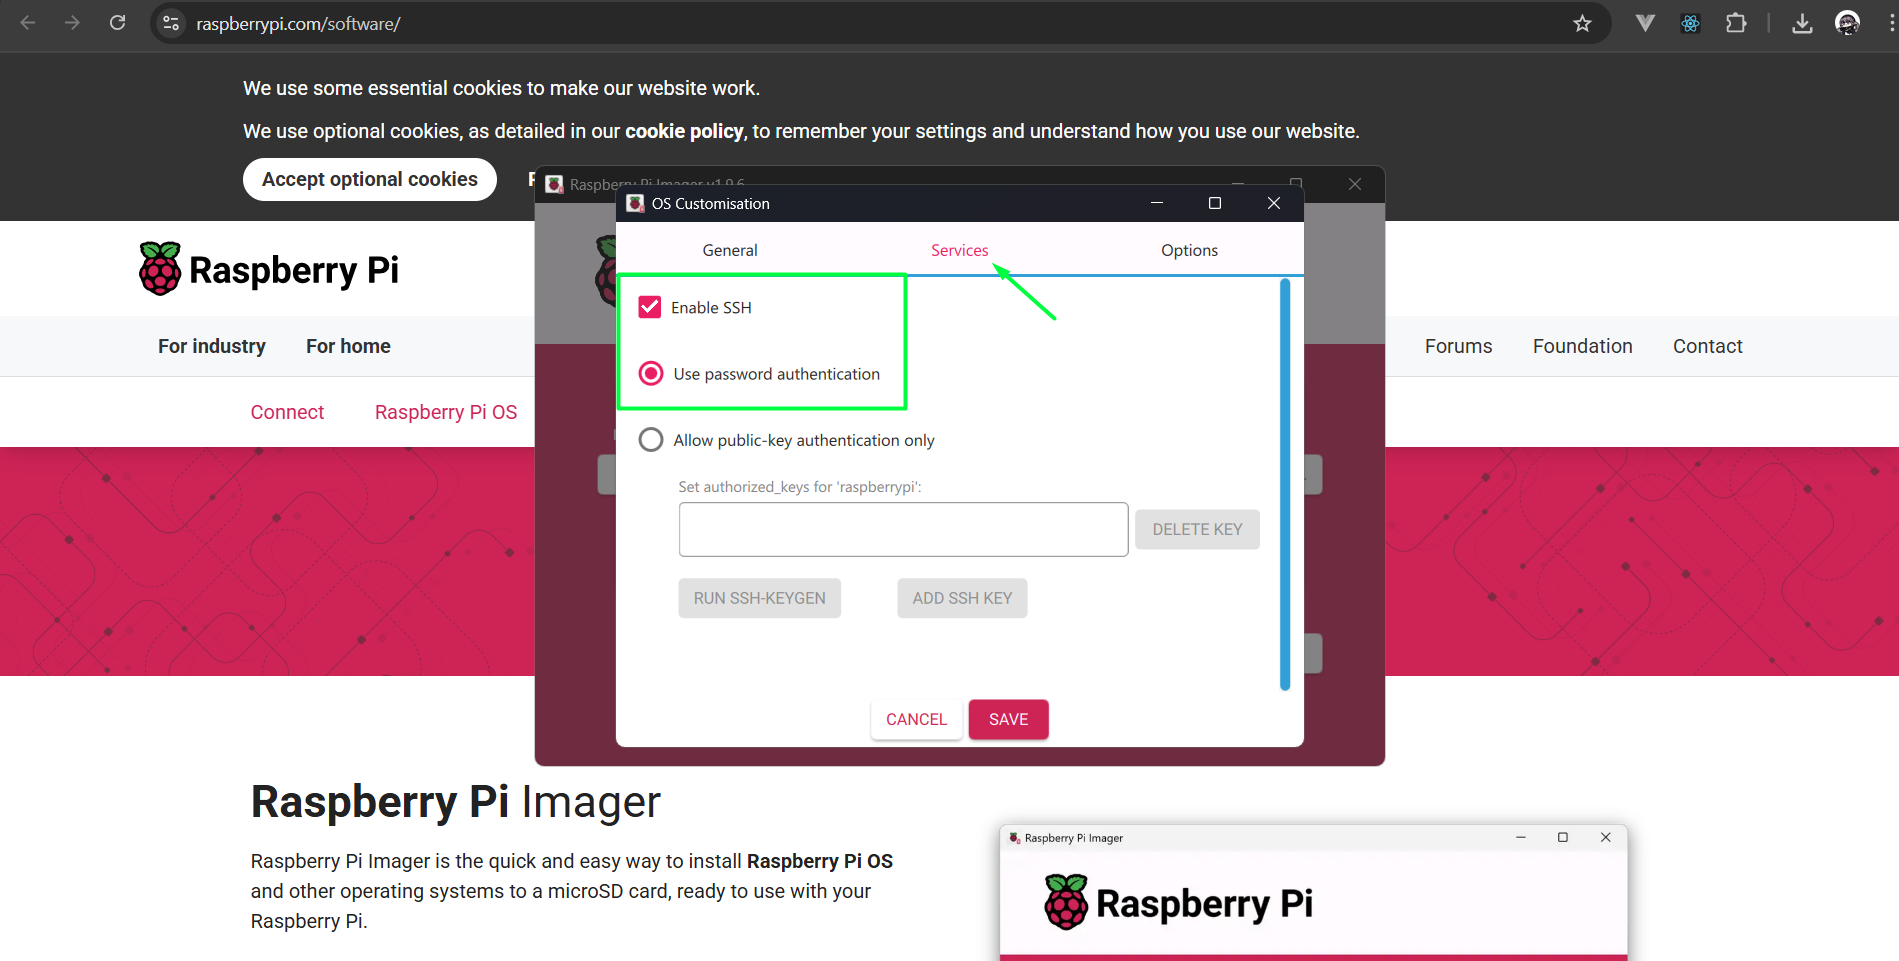
Enable SSH: This one is important, make sure you tick the box for this option
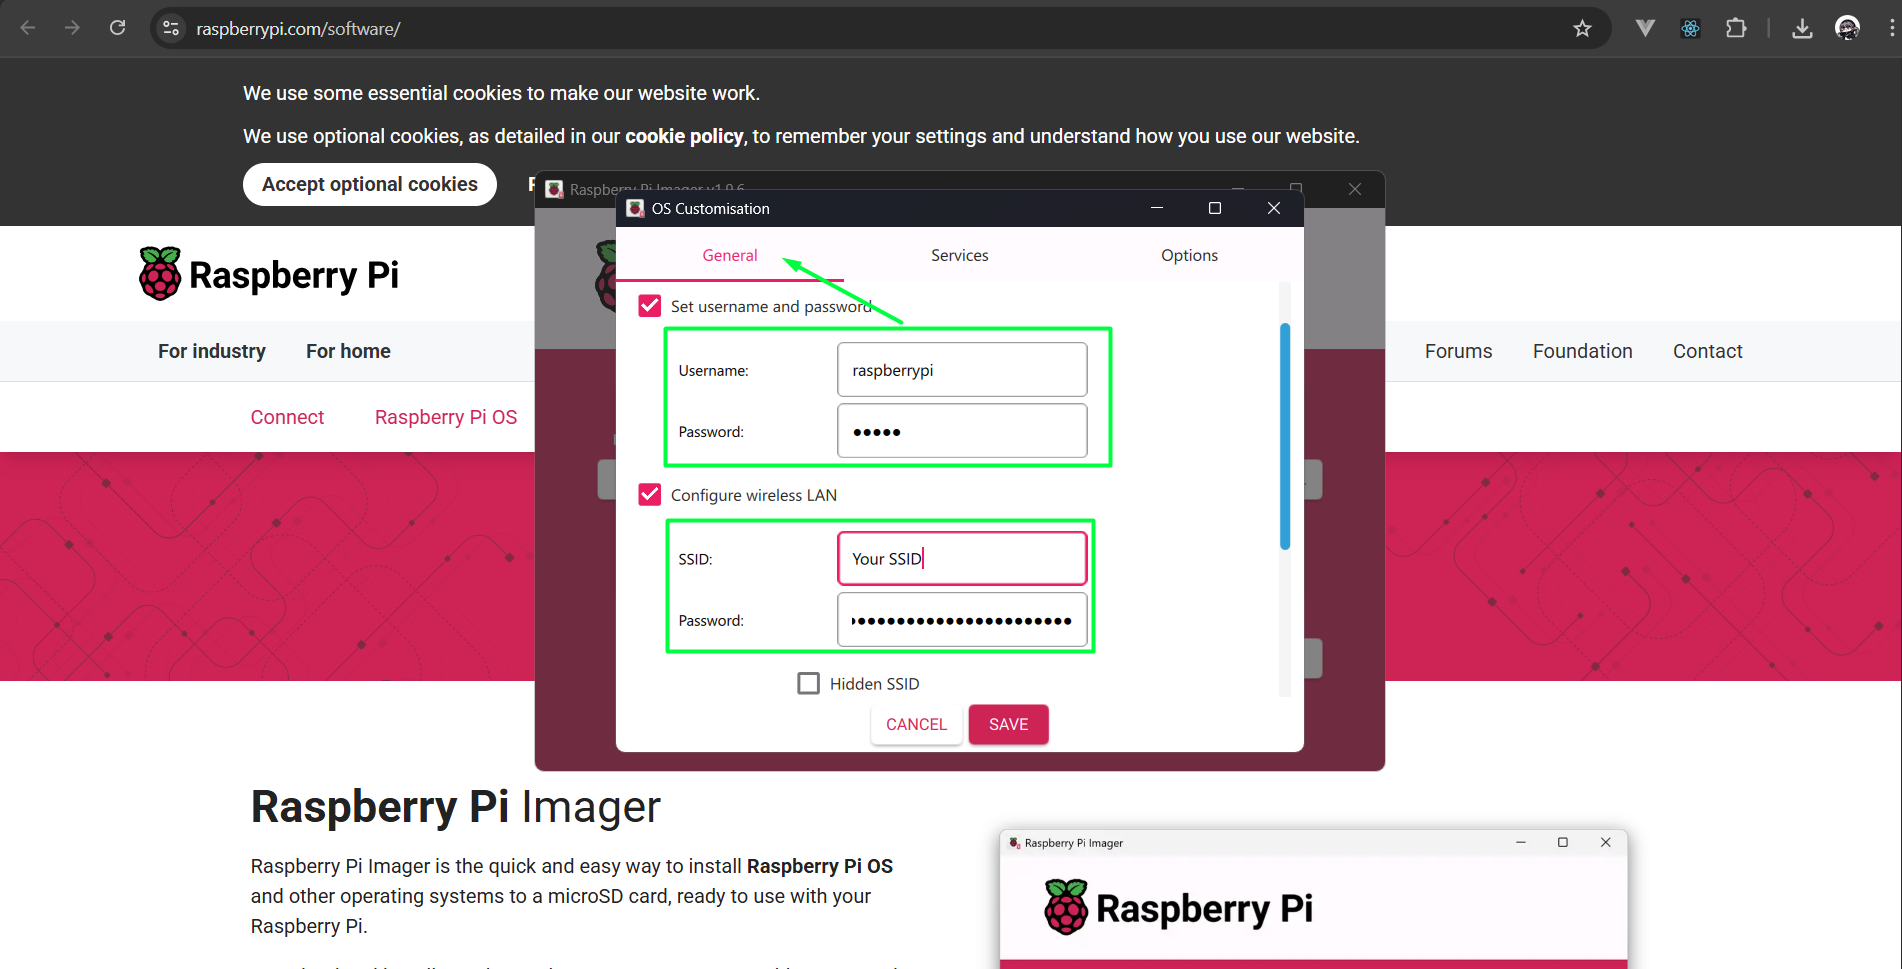
Configure Wifi: Enter your SSID and password so your Pi can connect to the internet on first
Set locale settings: Set your country, language and timezone
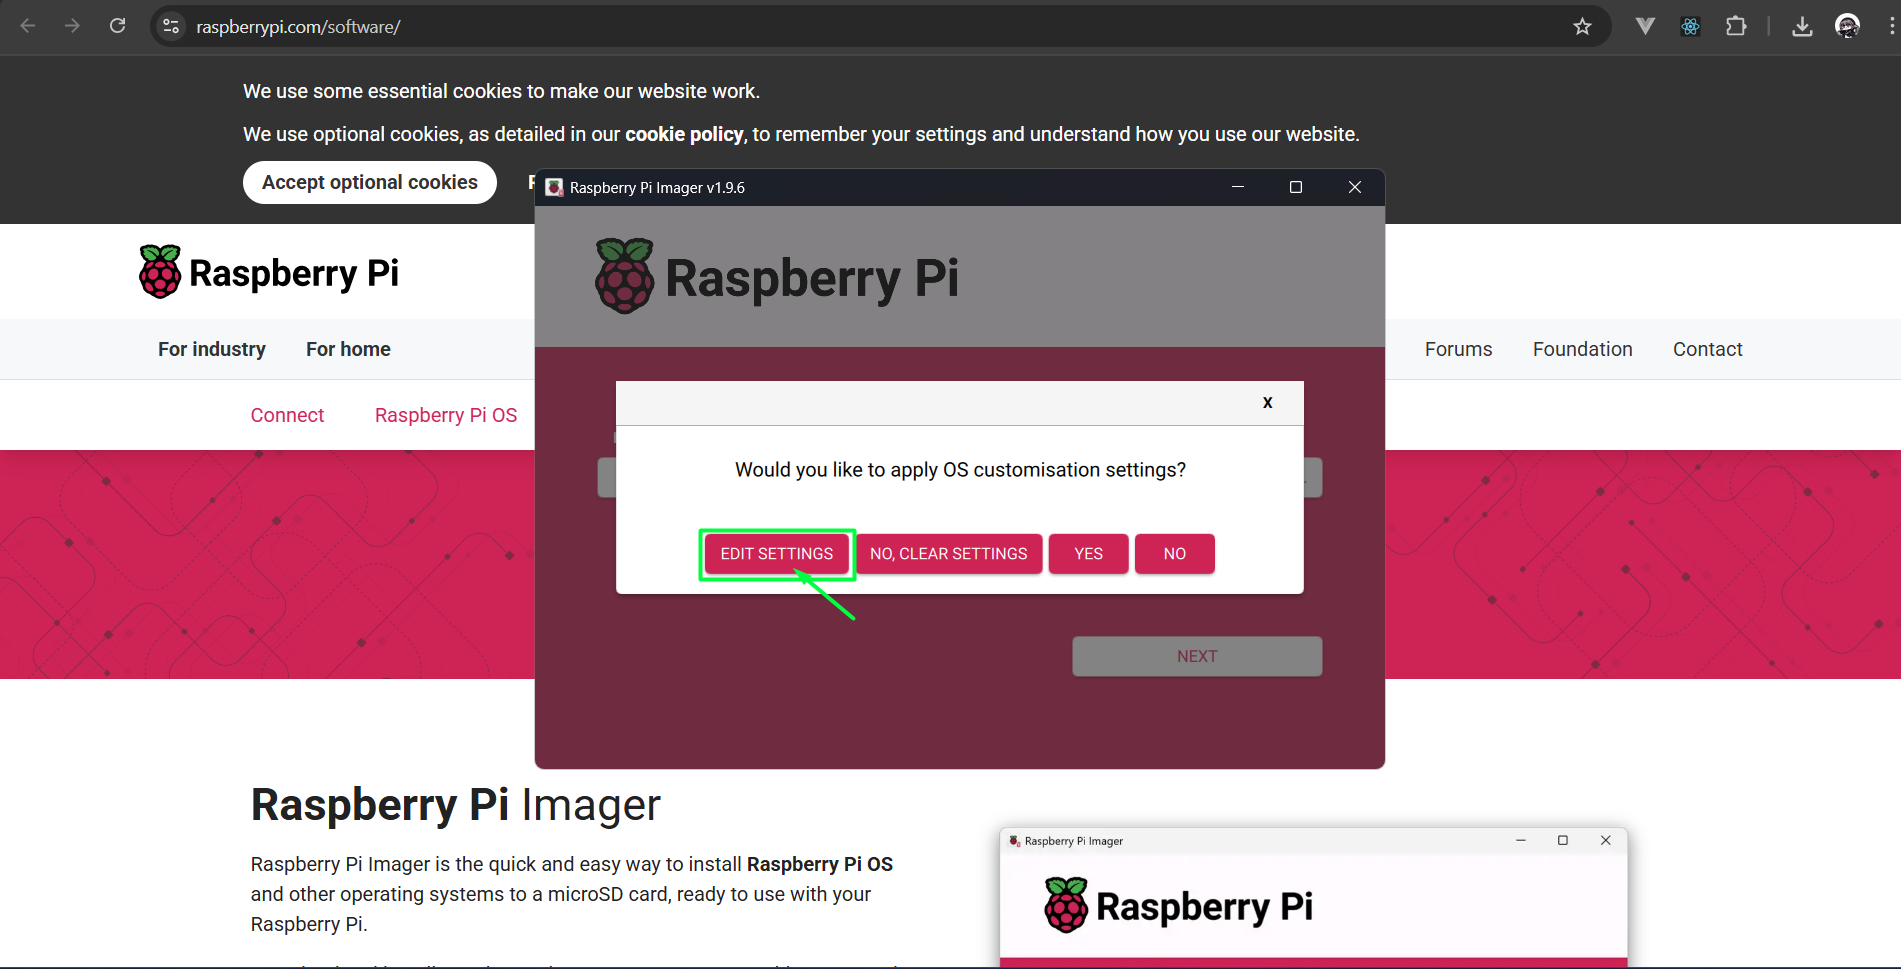
Click Save and then select Yes to flash the OS onto the MicroSD card
Once done, eject the MicroSD card and plug it into your Raspberry Pi. Connect the power supply to boot it up
Step 2: Initial Setup
Boot your Raspberry Pi and connect via SSH:
ping -4 raspberrypi.localIf it return IPv4 address then you are good to go. If not then there your wifi configuration in the previous step must had wrong.
It could be due to invalid SSID or password. You can either:- Flash OS again
- Use a LAN cable and connect it to your laptop/PC and set it an IP
ssh raspberrypi@<raspberry-pi-ip>Update the system:
sudo apt update && sudo apt upgrade -yInstall required software/tools:
Step 3: Setup VPN with Tailscale on you Laptop and Raspberry Pi
A VPN is secure, flexible, and lets you access your Raspberry Pi like you’re on the same local network—even from anywhere in the world.
There are a few good VPN options, but I highly recommend Tailscale if you want something fast and super easy to set up. Tailscale is a VPN built on WireGuard that automatically sets up a secure mesh network between your devices.
Here’s how you can do it:
- Go to https://tailscale.com/ and create an account > Sign up using Google / Github (choose your option)
- Install Tailscale client on your device from https://tailscale.com/download
Once complete, Tailscale icon should appear in your system tray
Right-click the icon > Log in using credentials you used to create the account
Tailscale will then ask you to authorize device to join you tailnet VPN
Click Connect > Then you will be able to view your device on Machines dashboard. - If you have already enabled SSH on Raspberry Pi, move on to step 4. If you have not, then follow these steps.
Runsudo raspi-configto open Raspberry Pi Configuration Tool Interface
Select Interface Options > SSH > Yes > Ok - To install Tailscale client on your Raspberry Pi, use:
sudo apt update
sudo apt upgrade -y
curl -fsSL https://tailscale.com/install.sh | sh
Then start Tailscale using:
sudo tailscale up
You can find your Tailscale IPv4 address by running:
tailscale ip -4
- Test the connection
ssh <pi_username>@<tailscale_ip>
or Enable SSH via Tailscale using:
sudo tailscale up --ssh
This allow you to directly SSH your Pi from a browser
Go to admin console > Click on Menu option > SSH to machine
It will then ask for login credential > SSH > Tailscale will open SSH session browser window
Step 4: Configure Edge station
git clone https://github.com/Itea-Lab/Weather-Edge.git
cd Weather-Edge
sudo nano .env
Paste the example .env file with your own credentials
Then run
docker compose up --build -d
You will then need to open InfluxDB UI on your laptop browser with <raspi_tailscale_ip>:8086, login and get the token
Once token is generated, copy and paste it into .env file
INFLUXDB_TOKEN=<your_token_here>
The complete .env file should look like this:
# InfluxDB Configuration
INFLUXDB_USERNAME=<username>
INFLUXDB_PASSWORD=your_password
INFLUXDB_ORG=weather_org
INFLUXDB_BUCKET=weather_data
# For Docker containers, use service name
INFLUXDB_ROUTE=http://database:8086
# Token will be obtained after InfluxDB initialization (see step 6)
INFLUXDB_TOKEN=<your_token_here>

# Data Configuration
DATA_LOCATION=<your_location_name> (district1, district2, etc)
MEASUREMENT_NAME=weather_sensor

# MQTT Configuration
MQTT_PUB=espclient
SUB_USERNAME=raspiclient
MQTT_PASSWORD=your_mqtt_password
MQTT_TOPIC=weather/data
MQTT_PORT=1883
BROKER_ENDPOINT=mosquitto

# Dashboard Configuration
JWT_SECRET=your-super-secret-jwt-key-here-make-it-long-and-random
JWT_EXPIRES_IN=1d
ADMIN_USERNAME=admin
ADMIN_NAME=Administrator
ADMIN_PASSWORD_HASH=your_password_hash_here
ADMIN_EMAIL=admin@example.com
ADMIN_ROLE=admin
TEST_USERNAME=testuser
TEST_NAME=Test User
TEST_PASSWORD_HASH=your_password_hash_here
TEST_EMAIL=test@example.com
TEST_ROLE=user
Step 5: Configure Device Certificates
Comeback to this step after you finish setup Sandbox Environment
- Register device in the Weather Platform dashboard
- Download certificates (certificate.pem.crt, private.pem.key, AmazonRootCA1.pem)
- Update the code with your certificates and IoT endpoint
You must insert all credential files inside /data-processor/credentials/ folder in order to publish data onto weather platform
Step 5: Test the Setup
Run the edge station again:
docker compose up --build -dVerify data transmission from the ES32 to Raspberry Pi by checking its container status and logs
docker compose ps
docker compose logs weather-edge-processor
Verify data appears in the dashboard
Make sure your Raspberry Pi has a stable internet connection for reliable data transmission.